Match reference imagery
Matching real-world reference imagery is essential for creating realistic synthetic data for training and testing.
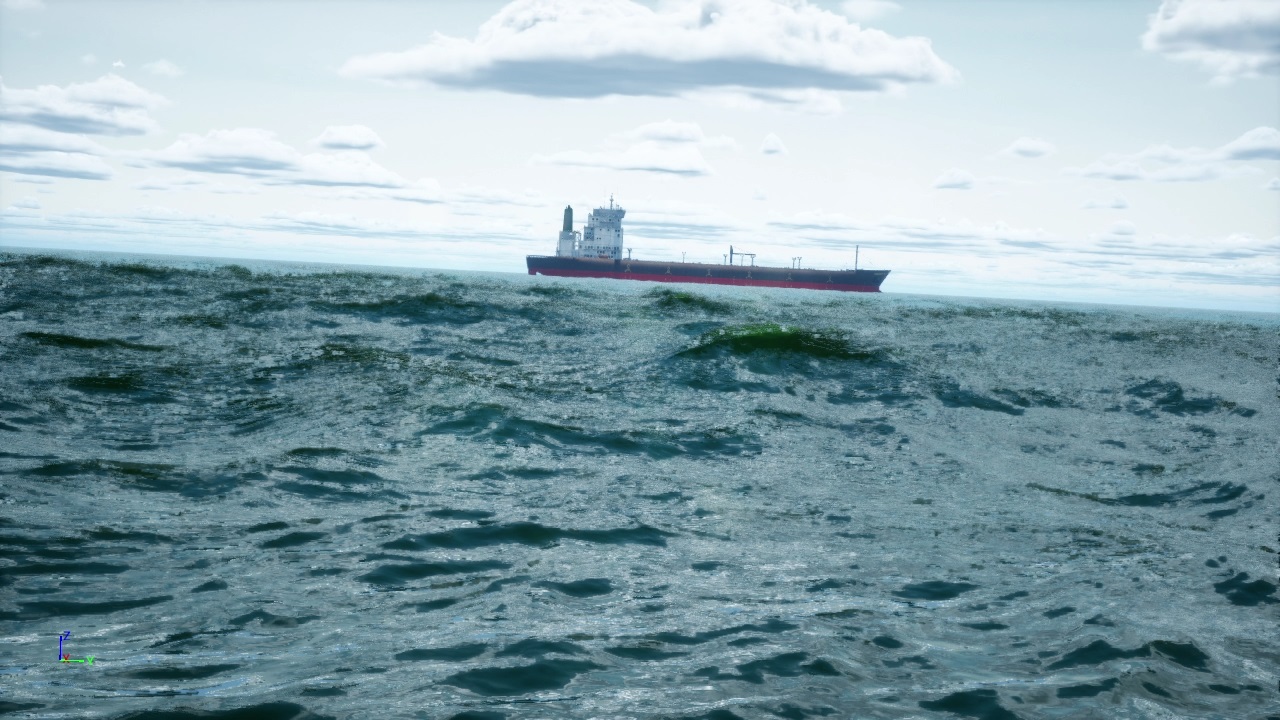
Example: Singapore Maritime Dataset
The Singapore Maritime Dataset is a standard toy dataset for maritime object detection. We’ll use it as an example of target reference imagery.
Understand capture setup
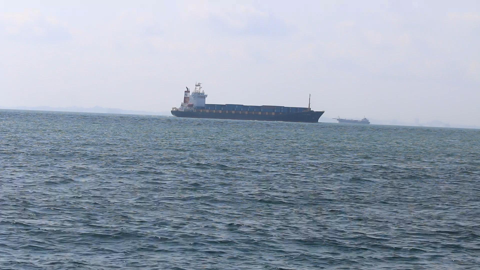
It can be extremely helpful to know how the reference imagery was captured. According to the authors, the above footage from the Singapore Maritime Dataset was taken with a Canon 70D camera placed on-shore on a fixed platform. This gives us clues on the camera’s position and intrinsics.
Select the appropriate world
Since the above scene shows an empty, open ocean with ships, we’ll select the Ocean world.
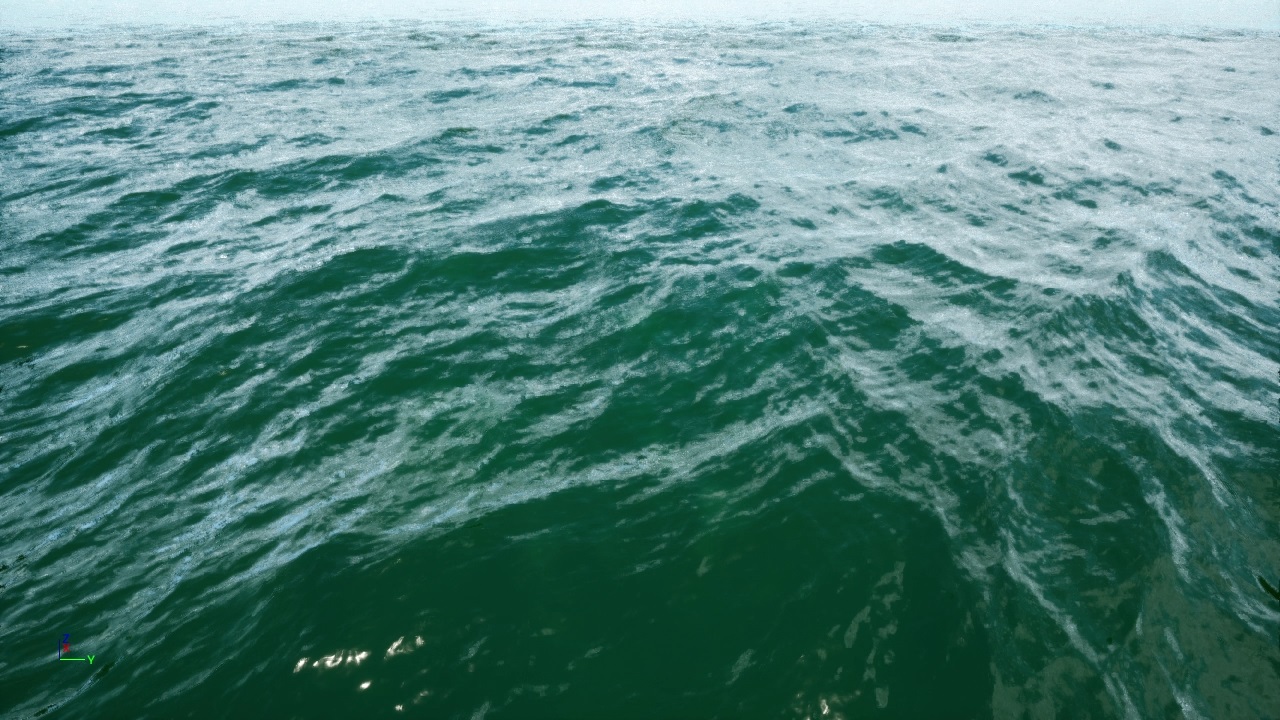
The default view in the Ocean world doesn’t seem to match our reference imagery, so let’s make some changes!
Match camera set up
The first step is to match the camera position and rotation. Place the camera at about eye level (1.7 meters). Notice that the camera is slightly tilted, so adjust the roll (-3 degrees) and pitch (-3 degrees) of the camera to match the tilt.
To match the zoom level, set the field of view (FOV) to 45 degrees.
world.camera.set_position(Vector3(0, 0, 1.7))
world.camera.set_rotation(Vector3(-3, -3, 0))
world.camera.set_fov(45)
Match assets
The next step is to match the assets. In the reference image, it looks like there are two vessels, a nearer container ship and a further unidentified ship.
We’ll only add the nearer ship for this example. Select the Horizon Unloaded asset for the container ship.
Place it 1200 meters forward and 50 meters to the right. Rotate it 90 degrees clockwise and add it to the world.
boat = Asset("boat", asset_name="Horizon Unloaded")
boat.set_position(Vector3(1200, 50, 0))
boat.set_rotation(Vector3(0, 0, 90))
world.add(boat)
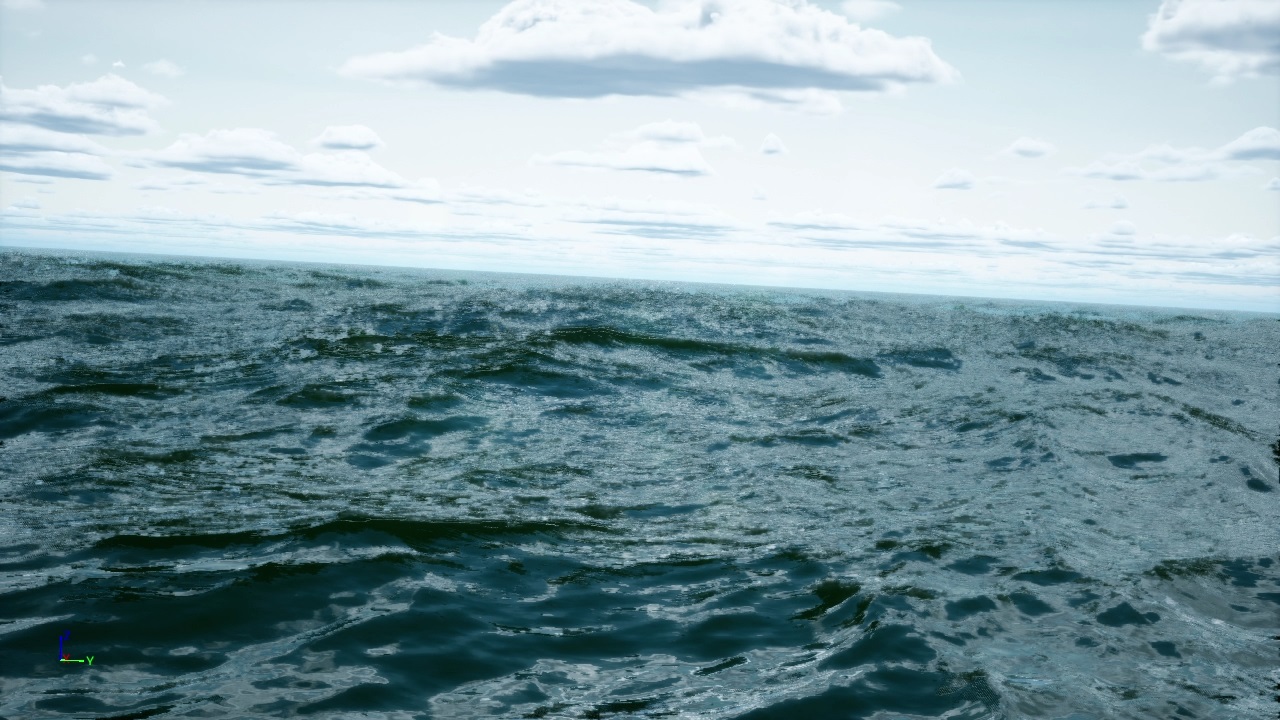
Match environment
The next step is to match the environment. The reference image shows a clear sky and relatively calm waters.
Do this by setting the sun intensity to 5, cloud coverage to 0 and the sea state to SMOOTH.
world.env.weather.set_sun_intensity(5)
world.env.weather.set_cloud_coverage(0)
world.env.ocean.set_sea_state(SeaState.SMOOTH)

Much better! The scene now closely resembles the reference imagery.
Tips and tricks
Tip: Apply presets
Apply presets to quickly match the look and feel of the scene to your reference imagery.
From the bottom drawer, click on Environment or Camera to access various presets.
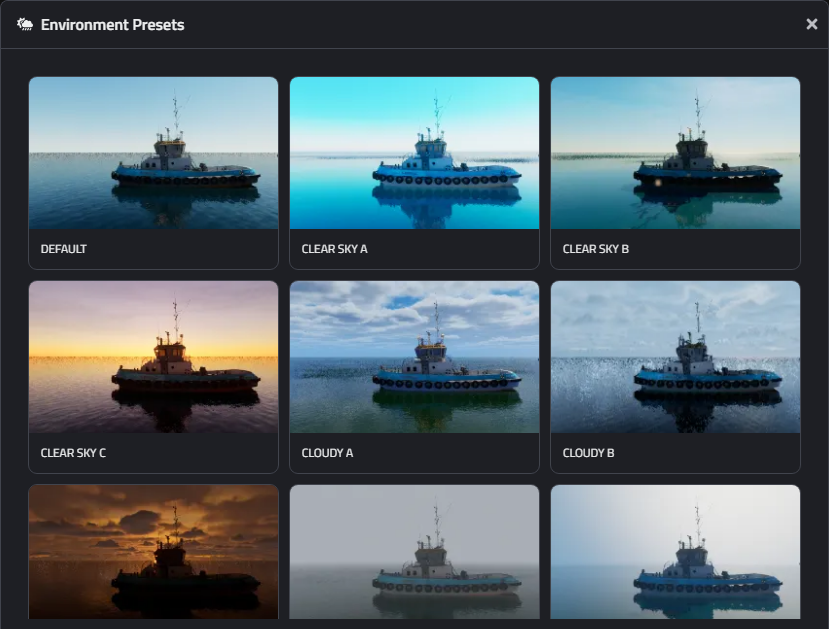

Selecting a preset will copy it to your clipboard. Paste it into your notebook and run the cell to apply the preset.
If you have reference imagery that doesn’t match the available presets, contact Bifrost support and we’ll be glad to help.
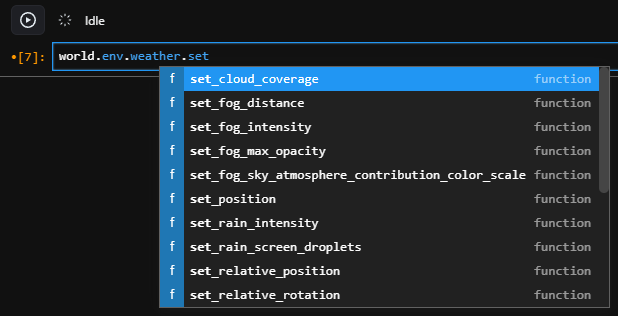
Tip: Use code completer to discover parameters
When dealing with world.camera, world.env.weather, and world.env.ocean, it’s useful to use the
code completer to discover available parameters and methods.
Press Tab anywhere to view suggestions.